Select the OPEN button to connect to your SSH Server. You will need to authenticate to the SSH server to establish the SSH tunnel.
With this SSH tunnel established, you will now use UltraVNC Viewer to connect to the machine you configured PuTTY for (172.16.0.101).
In the UltraVNC Server: edit box, enter localhost (127.0.0.1).
You will want to select the Options button and select your Format and Encoding settings as described in the graphic.
When you press the Connect button, it will route 5900 local port through the SSH tunnel to the 172.16.0.101 address (according to the PuTTY configuration).
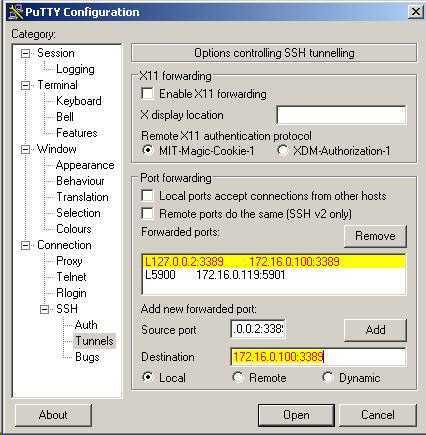
Likewise you could configure Windows XP Remote Desktop (Terminal Services) through SSH in the same manner. To include Remote Desktop, add an SSH tunnel like this:
This configuration would give you both VNC and Remote Desktop (Terminal Services) access to 172.16.0.101 through the SSH tunnel.
Note, the Source port is defined as 127.0.0.2:3389.
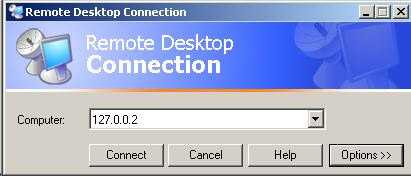
This is a bit "different". When you open MSTSC.EXE (the Terminal Services client), you would enter 127.0.0.2 as the connection:
This will connect you to the Terminal Services server of the host machine through an SSH tunnel.
UltraVNC Repeater and SSH Tunnel
Now, let's combine the UltraVNC Repeater and the SSH Tunnel so that we are able to use the UltraVNC Repeater through a secure SSH Tunnel.
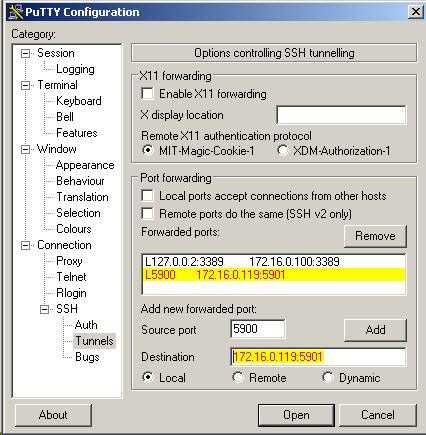
Simply change / add the following
SSH tunnel parameters:
NOTE: the source port is 5900, and the destination port is 5901.
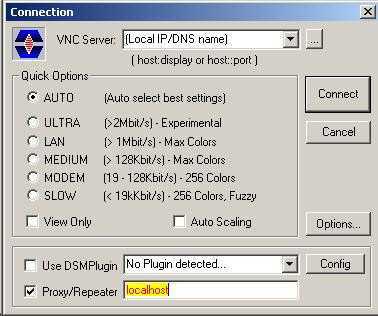
In the UltraVNC Viewer, connect using these settings:
NOTE: the Proxy/Repeater setting is localhost.

